Saturday, December 11, 2010

BizTalk Server Tutorial Part 5: Map

Continuing the application of Part4
Create the following additional folders:
1.    C:\BizTalkServerTutorial\FileDrop\TrackingApplication
Charan: We have a tracking application to keep record of all the loan applications received, but this application expects input in the following XML format.
<Request xmlns="http://TrackingApplication">
<SSN></SSN>
<Name></Name>
<Amount></Amount>
</Request>
So we can’t route a copy of the original message and it expect this input at this folder location ‘C:\BizTalkServerTutorial\FileDrop\TrackingApplication’ as XML file.
Rohit: Don’t worry BizTalk provide you maps to transform message from 1 message format to another. But for that you need to specify the format of the message by creating a schema.
Create the schema for Tracking application input XML
Open the BizTalk project ‘BizTalkTutorial.Part4’(Created in Part4 of this tutorial series) in Visual Studio 2010.Right click the ‘BizTalkTutorial.Part4’ and choose ‘Add -> Add New Item
Choose ‘Schema’ from ‘Schema Files’ and give ‘TrackingApplicationInputSchema.xsd’ as the name of the schema. Click Add button.
Rename the ‘Root’ in the generated schema to ‘Request’ and choose the ‘<Schema>’ node to change the ‘Target namespace’ to ‘http://TrackingApplication’ as shown below
Right click the ‘Request’ node and add the ‘Child Field Element’ as shown below. Rename it from ‘Field’ to ‘SSN’.
Similarly add two more ‘Child Field Element’ and rename them as ‘Name’ and ‘Amount’. Then change the ‘Data Type’ for ‘Amount’ from ‘xs:string’ to ‘xs:int’ as shown below
Next select the ‘TrackingApplicationInputSchema.xsd’ and in the Properties of this schema, set ‘Output Instance Filename’ to ‘C:\BizTalkServerTutorial\FileDrop\TrackingApplicationInput.xml
Next right-click the ‘TrackingApplicationInputSchema.xsd’ and choose ‘Generate Instance’.
It would generate an XML file ‘C:\BizTalkServerTutorial\FileDrop\TrackingApplicationInput.xml’. The content of this XML should be something similar to
<ns0:Request xmlns:ns0="http://TrackingApplication">
<SSN>SSN_0</SSN>
<Name>Name_0</Name>
<Amount>10</Amount>
</ns0:Request>
Now create a Map
Right click the ‘BizTalkTutorial.Part4’ and choose ‘Add -> Add New Item
Choose ‘Map’ from ‘Map Files’ and specify ‘LoanRequest_To_TrackingApplicationInput.btm’ as name of the map.Next click ‘Open Source Schema’ and choose ‘BizTalkTutorial.Part4.LoanRequest’ from ‘BizTalk Type Picker’ dialog box.
Click ‘Open Destination Schema’ and choose ‘BizTalkTutorial.Part4.TrackingApplicationInputSchema’ from ‘BizTalk Type Picker’ dialog box.
In mapper editor click ‘SSN’ in ‘LoanRequest’ schema and drag it to ‘SSN’ in the ‘TrackingApplicationInputSchema’. Similary do for the ‘Amount’ field.
In mapper editor drag ‘String Concatenate’ functoid. Then drag ‘FirstName’ field from ‘LoanRequest’ schema to it and then drag the ‘LastName’ field from ‘LoanRequest’ schema to ‘String Concatenate’ functoid. At last drag the ‘String Concatenate’ functoid to the ‘Name’ field in the ‘TrackingApplicationInputSchema
Next select the ‘LoanRequest_To_TrackingApplicationInput.btm’ and in the Properties of this map set ‘TestMap Input’ to ‘Native’ ‘TestMap Input Instance’ to ‘C:\BizTalkServerTutorial\FileDrop\App1Output.txt’ (Create in Part4 of this tutorial) and ‘TestMap Output Instance’ to ‘C:\BizTalkServerTutorial\FileDrop\MapOutput.xml’.
Next right-click the ‘LoanRequest_To_TrackingApplicationInput.btm’ and choose ‘Test Map’.
It would generate an XML file ‘C:\BizTalkServerTutorial\FileDrop\TrackingApplicationInput.xml’. The content of this XML should be something similar to
<ns0:Request xmlns:ns0="http://TrackingApplication">
<SSN>BMTP2000E</SSN>
<Name>NitinSachdeva</Name>
<Amount>50000</Amount>
</ns0:Request>
Next redeploy this solution and you must see the deployed map in the ‘BizTalkServerTutorialApplication’ as shown below
Next create a send port using the following details
Name: SP_TrackingApplication_FILE
Transport Type Adapter: FILE
Destination Folder: C:\BizTalkServerTutorial\FileDrop\TrackingApplication
Send pipeline: PassThruTransmit
In the ‘Outbound Maps’ tab select the map ‘LoanRequest_To_TrackingApplicationInput’ as shown below
Next create the ‘Send Port Group’. Specify the name of ‘Send Port Group’ as ‘SendPortGroup_RoutrLoanApplications’ and select both the send ports as part of this ‘Send Port Group’.
Go to filter tab and specify filter as ‘BTS.ReceivePortName == RP_SourceApplication’.
Remove the filer created for send port SP_DestinationApplication_FILE’ in part 2 and start both the send ports, after that start the Send port group and test the solution by putting a copy of file ‘C:\BizTalkServerTutorial\FileDrop\App1Output.txt’ in folder ‘C:\BizTalkServerTutorial\FileDrop\SourceLocation’.

Note: You have to restart the host instance so that the changes made to the deployed solution can take in affect.
Summary
You have seen
    How to create an XML schema.          
    How to create a sample file complying with schema.
    How to create and test map.
    How to use mapper at the send port.
    How to create send port group

 Cheers,
Rohit Sharma

Sunday, December 5, 2010

BizTalk Server Tutorial Part 4: Receive Pipeline

Charan: Hey dude I have another problem. We have replaced the application consuming the simple text file from the destination location (C:\BizTalkServerTutorial\FileDrop\DestinationLocation), the new application expect input as XML whereas first application drop its output at source location(C:\BizTalkServerTutorial\FileDrop\SourceLocation) as a comma delimited text file as shown below:

BMTP2000E,Nitin,Sachdeva,1983-10-06,50000
Fields description-SSNumber,FirstName,LastName,DOB(yyyy-mm-dd),Amount

Rohit:It can be done easily by creating a schema for flat-file(flat-file is a simple text file. It could be delimited as shown above or positional where each filed has a fixed length) and using a custom receive pipeline to convert the flat file into XML.

Steps
First, save the output into a sample text file (C:\BizTalkServerTutorial\FileDrop\App1Output.txt)

BMTP2000E,Nitin,Sachdeva,10/03/1983,50000

Next open the ‘Visual Studio 2010’ and create a BizTalk project with name ‘BizTalkTutorial.Part4’ as shown below:

Right click the ‘BizTalkTutorial.Part4’ and choose ‘Add New Item

Choose ‘Flat File Schema Wizard’ and give ‘LoanRequest.xsd’ as the name of the schema.

Click next on First Screen and specify the information in ‘BizTalk FlatFile Schema Wizard’ as shown below and click Next button.

On Next screen select the data in our case we are having only one row so select it as shown below and click Next button.

Because input file is comma delimited so select ‘By delimiter symbol’ and click Next button.

On next screen select comma(,) as child delimiter for record as each field in record is delimited by comma(,) character and click Next button.

Specify the name of the field and appropriate data type as shown below and click Next button.

Click finish to generate flat-file schema.

Next create a custom receive pipeline
Right-click ‘BizTalkTutorial.Part4’ and choose ‘Add -> New Item…’. Specify the name of receive pipeline as ‘ReceivePipelineForLoanRequest.btp’ and click Add.

Drag ‘Flat file disassembler’ from the toolbox to Disassemble stage and set Document Schema as ‘BizTalkTutorial.Part4.LoanRequest’ as shown below

Right click the ‘BizTalkTutorial.Part4’ and choose properties to open the project properties. Go to Deployment tab and specify Application Name as ‘BizTalkServerTutorial’.

Go to Signing tab and create a new key with name ‘Key.snk’ to Sign the assembly.

Right-click ‘BizTalkTutorial.Part4’ and choose Build after successfully building the solution again right-click ‘BizTalkTutorial.Part4’ and choose Deploy. Your assembly should now be deployed to BizTalk server and GAC.

You can verify the deployed assembly by going to ‘Resources’ in ‘BizTalkServerTutorial’ application.

You can also verify the deployed receive pipeline in ‘Pipelines’.

Now open the properties for the receive location ‘RL_SourceApplication_FILE’ and select the newly deployed receive pipeline.

Test the solution this time you will get output at destination folder in XML format.

Summary
You have seen
    How to create BizTalk project in Visual Studio 2010.
    How to create flat file schema using the Flat File Schema Wizard
    How to create receive pipeline
    How to specify the BizTalk application name for deploying generated assembly
    How to sign the assembly
    How to build and deploy the BizTalk project 
    How to use Flat-File disassembler to covert flat-file to XML.

Saturday, December 4, 2010

BizTalk Server Tutorial Part 3: BizTalk Architecture Review

So after completing the ‘Simple end-to-end’ tutorial you must be having some idea about the message flow in BizTalk. Let us see the component of BizTalk Architecture covered till now. So the following diagram shows the flow of the message through different components.
So in this application we need to interact with the file system this is why we have used the FILE adapter. But interacting with any other system just requires you to configure the adapter properties for the particular adapter.

BizTalk Server Tutorial Part 2: A Simple end-to-end application

Prerequisite:
Create BizTalk application 'BizTalkServerTutorial’as mentioned in Part1 and
Create the following folders:
1.    C:\BizTalkServerTutorial\FileDrop\SourceLocation
2.    C:\BizTalkServerTutorial\FileDrop\DestinationLocation
3.    C:\BizTalkServerTutorial\FileDrop\SampleOutput.txt(A file containing some random text).

Charan: I have a problem, one of my applications is dropping some output files at a folder location (C:\BizTalkServerTutorial\FileDrop\SourceLocation), but another application needs these as input at some different location (C:\BizTalkServerTutorial\FileDrop\DestinationLocation). Can BizTalk help me here?
Rohit: Though BizTalk is not a tool to do such kind of data transfer.But this is a very simple application to show you how BizTalk works. So follow these steps to get it solved.

In ‘BizTalkServerTutorial’ application create a new receive port as shown below
Specify the name of the receive port as ‘RP_SourceApplication’ as shown below
Next create a receive location as shown below
Specify the name of the receive location as ‘RL_SourceApplication_FILE’. Select the transport type as ‘FILE’ [see here you are choosing FILE adapter because you need to receive the file from file system]. Pay attention to ‘BizTalkServerApplication’ as ‘Receive Handler’. ‘PassThruReceive’ as ‘Receive pipeline:
Next clock the ‘Configure…’ button to configure the properties for receive FILE adapter. Set ‘Receive Folder’ as ‘C:\BizTalkServerTutorial\FileDrop\SourceLocation’. Set ‘File mask:’ as ‘*.*’ and get out of the box by clicking on Ok button.
Then click ok button on ‘Receive Location Properties’ dialog box.
Then click ok button on ‘Receive Port Properties’
In ‘BizTalkServerTutorial’ create a new send port as shown below
Specify the ‘Name:’ as ‘SP_DestinationApplication_FILE’ transport type as ‘FILE’ and click the ‘Configure..’ button to configure the ‘FILE Transport Properties’. In ‘FILE Transport Properties’ specify ‘Destination folder:’ as ‘C:\BizTalkServerTutorial\FileDrop\DestinationLocation’ and ‘File name:’ as ‘%SourceFileName%’.
Next ‘Enable’ the receive location ‘RL_SourceApplication_FILE’ as shown below. 
 And test the receive location by pasting a copy of file ‘SampleOutput.txt’ at folder location ‘C:\BizTalkServerTutorial\FileDrop\SourceLocation
Charan: the file get deleted from the source folder but I have not received it at destination folder. Why?
Rohit: That is expected I have done it intentionally to show you the BizTalk error logging mechanism and the structure of BizTalk message. Check Application event viewer and see the error details
Notice the error details “The published message could not be routed because no subscribers were found…”. So BizTalk work using the publish/subscribe pattern. The message received from source location get published to the BizTalk Message Box but nobody is subscribing, in such cases the BizTalk log the error in the Application event log to notify. Let us see the BizTalk message structure.
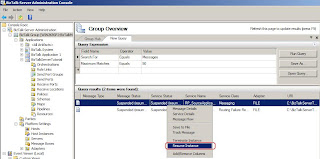
Go to ‘BizTalk Group’, go to ‘New Query’ tab choose ‘Messages’ from ‘Search For’ drop down and click ‘Run Query’. You will see the 2 suspended messages. Right click on the first one and choose ‘Message Details’ to see the message structure.
Each message has ‘Context’ and ‘body’. ‘body’ contain the content of the file, whereas ‘Context’ contains the message properties like name of receive location, adapter type used to receive message etc. some of these properties are ‘promoted’ e.g. ‘ReceivePortName’.
Promoted properties can be used for creating the subscription. Let us see how to create the subscription. Open the ‘Send Port Properties’ dialog box by double clicking the ‘SP_DestinationApplication_FILE’ send port and set the filter as shown below i.e. by setting ‘BTS.ReceivePortName == RP_SourceApplication’.

Next ‘Enlist’ the send port as shown below [upon enlisting the send port a subscription get created in BizTalk message box stating that a copy all the messages received having promoted context property ReceivePortName with value ‘RP_SourceApplication’ need to be routed to this send port] and after that ‘Start’ the send port.
Now ‘Resume’ the suspended message with ‘Service Status’ ‘Suspended (resumable)’ you will get the file at the destination location.
Summary
You have seen
    How to create receive port
    How to create send port
    How to create subscription for a message using Filters

    The structure of the message in BizTalk and what the context of message contains
    How to use FILE adapter
     How to use BizTalk MMC to query the suspended messages
    How to resume suspended messages

Cheers,
Rohit Sharma

BizTalk Server Tutorial Part 1: BizTalk Application

Charan: In the BizTalk definition it is said that developer can create mappers for transformation, orchestrations for processing though I don’t understand what these are but still I have a question, how the things get managed in BizTalk once you have developed many maps, orchestrations and other BizTalk artifacts.
Rohit: You are too quick. For managing the BizTalk artifacts developed for different requirements BizTalk provide a logical container called BizTalk application.
Let me show you how to create a new application in BizTalk. We’ll use it for latter part of tutorial.
First, open the ‘BizTalk Server Administration Console’ the path is ‘Start -> All Programs -> Microsoft BizTalk Server 2010 -> BizTalk Server Administration
Then, Create a new application as shown below
Specify the name of application as ‘BizTalkServerTutorial
Charan: Is there any other advantage of creating this application except logically grouping the BizTalk Artifact?
Rohit: Yes, you can export the BizTalk application from your development environment as MSI package and can import it on other machine (production/demo etc.). Let me show you how.
Export the ‘BizTalkServerTutorial’ as MSI package as shown below:
Just see the different steps and click ‘Next’ as this application is empty so only the logical container will get exported as MSI package. On ‘Destination’ specify the path for the MSI file and click on ‘Export’.
For demonstration I am deleting the ‘BizTalkServerTutorial’ application as show below.
Then I will import the MSI package for ‘BizTalkServerTutorial’ application as show below.
Specify the path of the MSI package and run the Wizard by clicking Next button.
At finish screen notice this check box because our ‘BizTalkServerTutorial’ application doesn’t contain any BizTalk artifacts (Orchestrations, maps etc.) so we are not required to run the ‘Application Installation Wizard’ this time to install the DLL containing these artifacts to GAC.

Summary
You have seen
    How to open BizTalk Server Admin Console.
    How to create BizTalk Application
    How to Export and Import BizTalk Application as MSI package


Cheers,
Rohit Sharma